23 Aug 2015
Belle
Exist for iOS: Adding the mood card
This is the second in my series about building the Exist for iOS companion app. If you haven’t read part 1, you’ll want to catch up so you know what I’ve been doing so far.
This week I worked on adding a card to the dashboard with today’s mood rating.
Handling the mood data
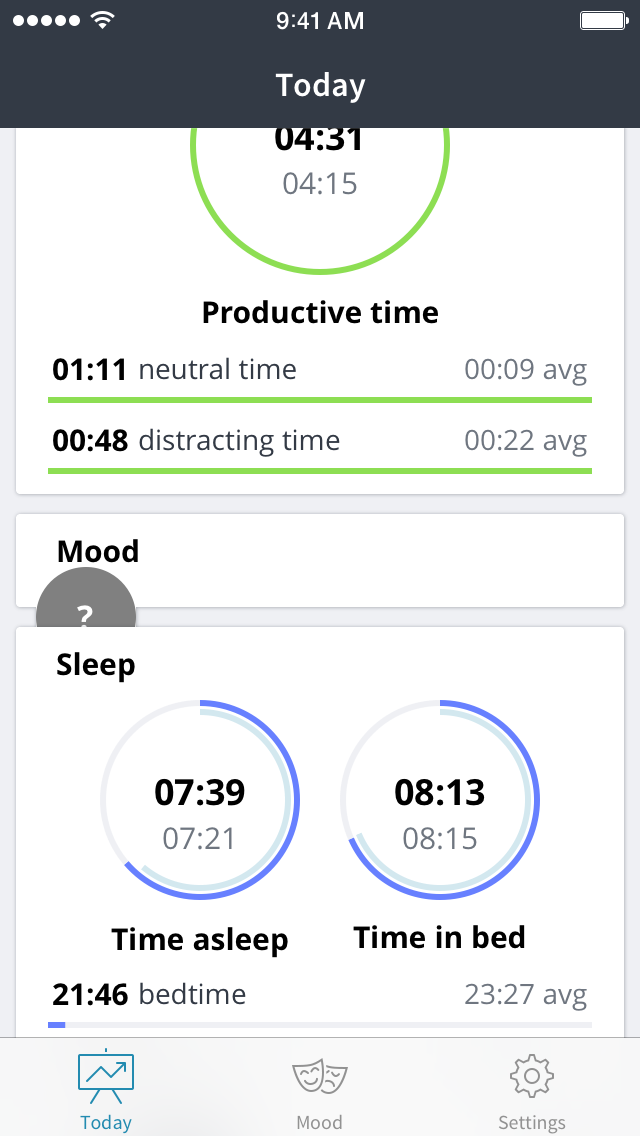
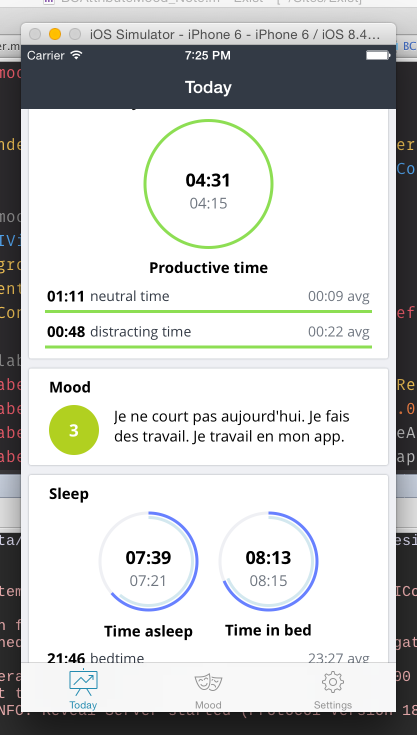
I already download and present mood data in the mood list, my second tab:
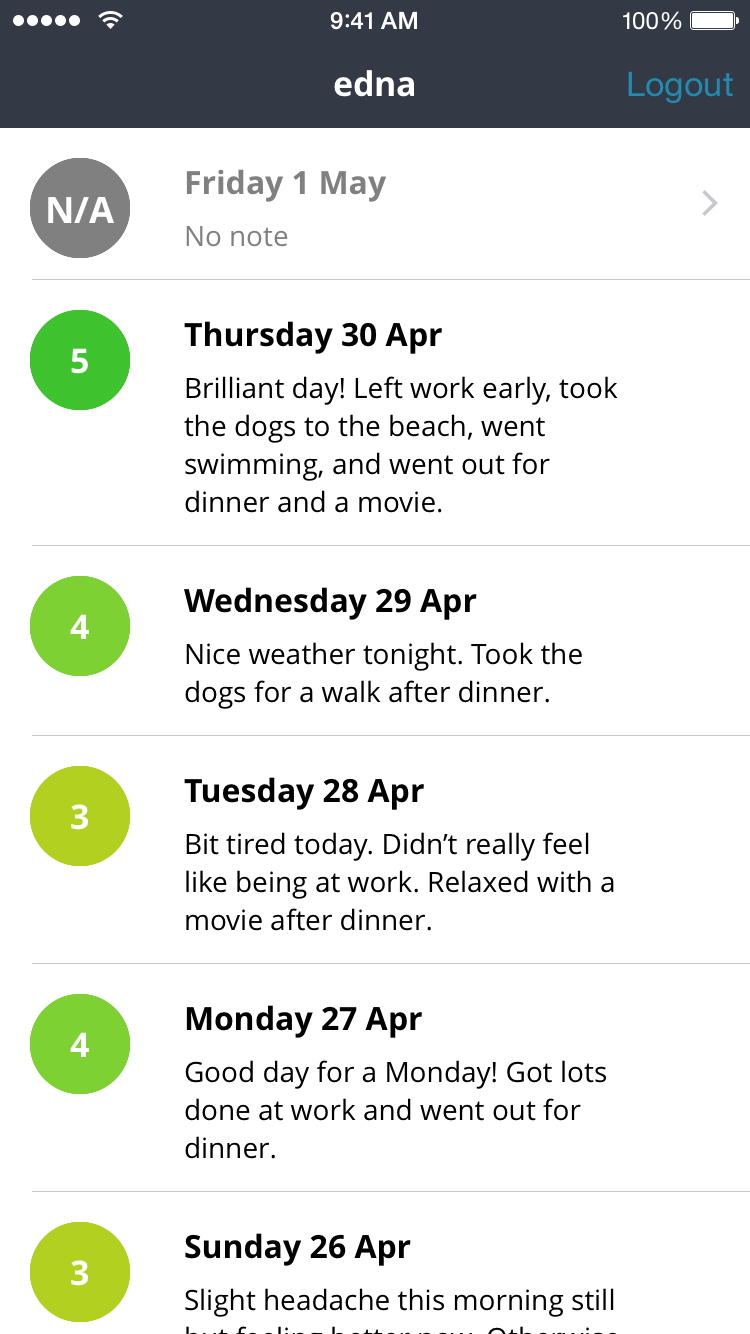
This list uses a UITableViewController with custom table cells, so I couldn’t reuse that code directly for the dashboard. As you’ll remember from part 1, my dashboard layout is made up of custom views created to look like cards.
I was able to reuse some of the code from my custom table cells to check whether I had mood data (if the user has already rated today) or not, and to style that data.
As a refresher, the logic for laying out the cards works like this:
BCDashboardViewController runs a for-loop, checking if each attribute group’s name (in this case mood is the group, which contains two attributes: mood and mood_note) matches the name of a custom class I’ve created. If so, it instantiates that class and calls the method renderWithData on it. Otherwise it falls back on a default attribute group class and calls the same method on that one, once instantiated.
BCAttributeGroup *group;
UIView *groupView;

if (NSClassFromString(classString)) {
   // There's a custom class to match this group
   // Instantiate a new instance of the custom class
   // Cast it to the base class because I don't know
   // what it is so I can't talk to it
    group = (BCAttributeGroup *)[NSClassFromString(classString)
        new];
    groupView = [group renderWithDataFromDict:groupDict
        withAverages:_averagesDict andUnits:imperial];

} else {
   // Fall back to the default group
   group = [BCAttributeGroup new];
   groupView = [group renderWithDataFromDict:groupDict
        withAverages:_averagesDict andUnits:imperial];
}
In this case, I have a custom class for the mood group, so it’s instantiated and its renderWithData method is called. It, in turn, runs a for loop to check if each attribute name matches the name of a custom attribute class. If so, it instantiates that class and calls its renderWithData method. If not, it does the same on a fall-back default attribute class.
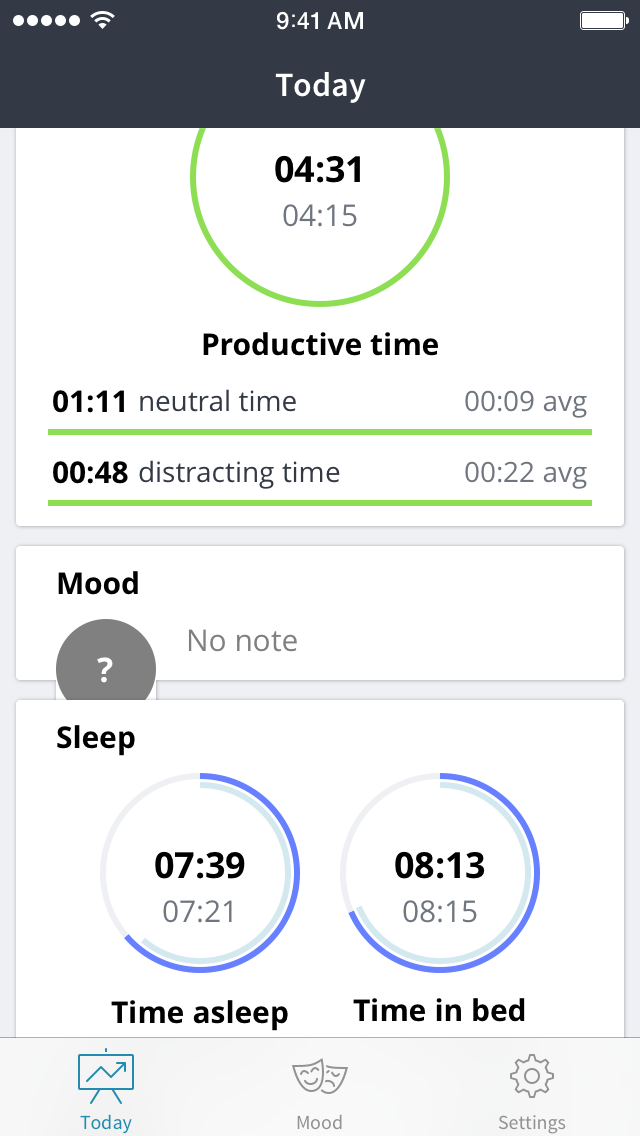
I have custom attribute classes for both the mood and mood_note attributes, so they’re instantiated and their renderWithData methods are called. In these methods I check if the data (an int for the mood attribute; an NSString for mood_note) is null, and if so create default data—a grey circle with a question mark in it, and grey text that says “No note”.
If there is data I style it accordingly—each mood rating between 1 and 5 (1 is terrible, 5 is perfect) corresponds to a colour. I create a circle in that colour with the number in the middle and style the note in black text.
This part was mostly copied-and-pasted text from the code I use to create my custom table cells, so it wasn’t too hard. One issue I ran into was a duplicate symbols error when I first tried to build the app after making these changes. I had an array of arrays that held the three RGB float values for each of my six colours—1-5 mood colours and the grey I use when there’s no user data yet. I’d copied-and-pasted this array into both my custom mood and mood_note attribute classes, and it was still in my custom table cell class.
To fix this, I moved the array into a class method in my BCConstants class that returns colours and fonts I use throughout the app. I removed the array from all three of the other classes, and made them all access the colours via the BCConstants class method. My code is more verbose now, but it makes more sense (and the error disappeared).
[circleView setBackgroundColor:[UIColor
    colorWithRed:[BCConstants getMoodColorForScore:
    _moodScore RGBcolor:0]
    green:[BCConstants getMoodColorForScore:
    _moodScore RGBcolor:1]
    blue:[BCConstants getMoodColorForScore:
    _moodScore RGBcolor:2] alpha:1.0f]];
Auto Layout shenanigans
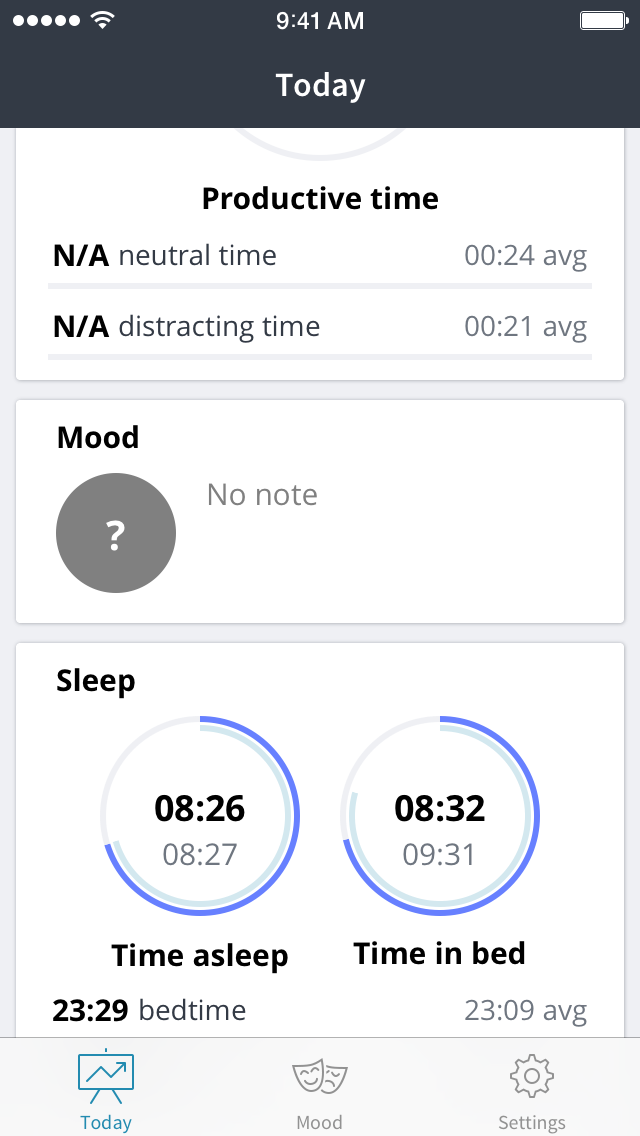
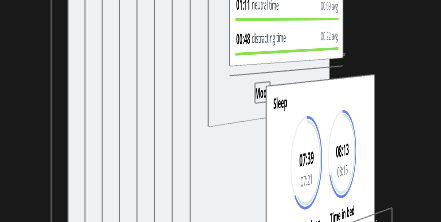
The hardest part of setting up the mood card, as usual, was wrangling Auto Layout. The first time I ran the app, I ended up with a gap where my mood card should be:
I use Reveal to debug my layouts often, and it really came in handy this time. I struggled with this gap for a long time without making any progress before I fired up Reveal and realised the problem:

When I turned my app around in Reveal, I noticed this line where my mood card should be. Clicking on it, I realised it was my mood card.
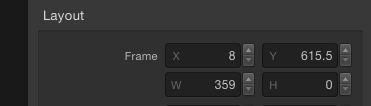
Reveal shows measurements of each of your views, and in this case it showed that while my mood card’s view had a width, it had no height. At least I knew where to start looking now.
I tried a few different things that didn’t fix the height issue, though I did get the card’s label to show up. You can see in the screenshot below from Reveal that the label is offset from the top of the card; the card just isn’t tall enough to contain the label, so it ends up behind the sleep card.
After banging my head in frustration for a while, I realised why the output didn’t match what I had coded: some of my code wasn’t running. I’d created some of my constraints in separate methods that were called on each of the two attribute views after they were created, but the last three constraints required all of the views to be present. For instance, I needed to constrain the mood view with the mood_note, so I needed to be sure both had been created before attempting this.
I did that by checking my for-loop for the last time through, and creating my last three constraints when that condition was met.
if (i == items.count -1) {
    // Last time through

[view addConstraint:[NSLayoutConstraint
    constraintWithItem:_moodScoreView
    attribute:NSLayoutAttributeTop
    relatedBy:NSLayoutRelationEqual
    toItem:_moodNoteView
    attribute:NSLayoutAttributeTop
    multiplier:1.0
    constant:0]];

[view addConstraint:[NSLayoutConstraint
    constraintWithItem:_moodNoteView
    attribute:NSLayoutAttributeLeading
    relatedBy:NSLayoutRelationEqual
    toItem:_moodScoreView
    attribute:NSLayoutAttributeTrailing
    multiplier:1.0
    constant:15]];

[view addConstraint:[NSLayoutConstraint
    constraintWithItem:_moodScoreView
    attribute:NSLayoutAttributeLeading
    relatedBy:NSLayoutRelationEqual
    toItem:groupTitle
    attribute:NSLayoutAttributeLeading
    multiplier:1.0
    constant:0]];
}
By adding some logs I figured out that this “last time through” code was never running. More logs helped me to work out the second (and last) time through the loop the attribute wasn’t matching a custom attribute class, and so was hitting my continue code (since I didn’t want any non-custom attributes that showed up to be rendered at all, even as default attribute types).
A bit more digging helped me to realise this was all due to a typo. My custom class was BCAttributeMood_note, since I thought capitalising the string of the attribute I received via JSON from the API would only capitalise the first letter. Turns out it was capitalising the first letter of each word, so it was looking for BCAttributeMood_Note but not finding such a class. I refactored the class name and my last three constraints were added—my mood card finally showed up.
The first time it showed up, my mood card looked like the example in the screenshot above. It was there, but obviously my Auto Layout constraints weren’t working as intended.
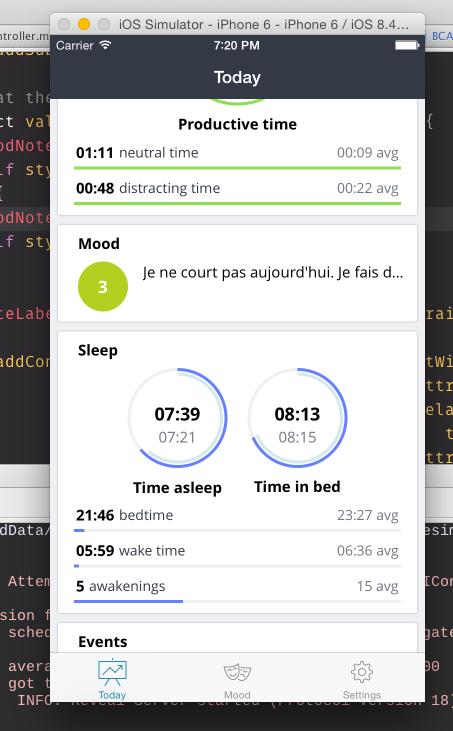
Part of the issue came from the way I created the mood_note view, which held a label—in this case the label says “No note”, although you can’t see it. I was using constraints to make the label the same height and width as its view, but I wasn’t pinning it to the view, so the note itself was showing up in the wrong place. I added constraints to pin the leading, top, and bottom of the label to the leading, top, and bottom of the view, and then I could see the note:
Getting closer! I’d also made a mistake with the constraint for the bottom of the card view. I was constraining it to the bottom of the mood attribute view, but when the mood_note attribute view was taller than the mood, the card wouldn’t stretch to accommodate it. Because the data is dynamic, I had to add a check to see which of the two elements was taller, and thus which should be used for the card view’s bottom constraint.
if (_moodNoteView.frame.size.height > 60) {
    // 60 is height of mood score so note is taller
    // need to pin bottom of view to tallest subview
    // so it stretches to fit

    view addConstraint:[NSLayoutConstraint
        constraintWithItem:_moodNoteView
        attribute:NSLayoutAttributeBottom
        relatedBy:NSLayoutRelationEqual
        toItem:view
        attribute:NSLayoutAttributeBottom
        multiplier:1.0
        constant:-15]];

} else {
    [view addConstraint:[NSLayoutConstraint
        constraintWithItem:_moodScoreView
        attribute:NSLayoutAttributeBottom
        relatedBy:NSLayoutRelationEqual
        toItem:view
        attribute:NSLayoutAttributeBottom
        multiplier:1.0
        constant:-15]];
}
Finally I tried submitting a mood entry and updating the dashboard. This helped me to realise there was one more thing I’d forgotten to do…
No word wrapping! Once that was added, the mood card was done.
Phew! Apart from the Auto Layout trouble, this process wasn’t too bad. I have one more custom card to lay out soon—the weather card. That’ll involve much more Auto Layout fun, no doubt. Apart from that, there isn’t too much to do now before beta testers can have a go at breaking my dashboard. Yay!